Why does my cut-in look different from the rest of the wall?
Paint problems, explained
Same paint, same can, and yet there's a visible band around every edge of the room. It has a name, it has a cause, and it's fixable.
By Jose Rivera Owner, Flexcoat 20+ years Combat veteran
You cut in around the ceiling and the trim, rolled the walls with the same paint out of the same can, and now there's a visible band a few inches wide running around the edge of every wall. Different sheen, different texture, sometimes a slightly different color. In the trade this is called picture framing or hatbanding, and it's one of the most common things that goes wrong on a DIY paint job.
The good news: it's almost never the paint's fault, and it's fixable. Here's what's actually happening.
Cause 1: Texture — a brush and a roller leave different surfaces
This is the big one, and it's the cause most people never consider.
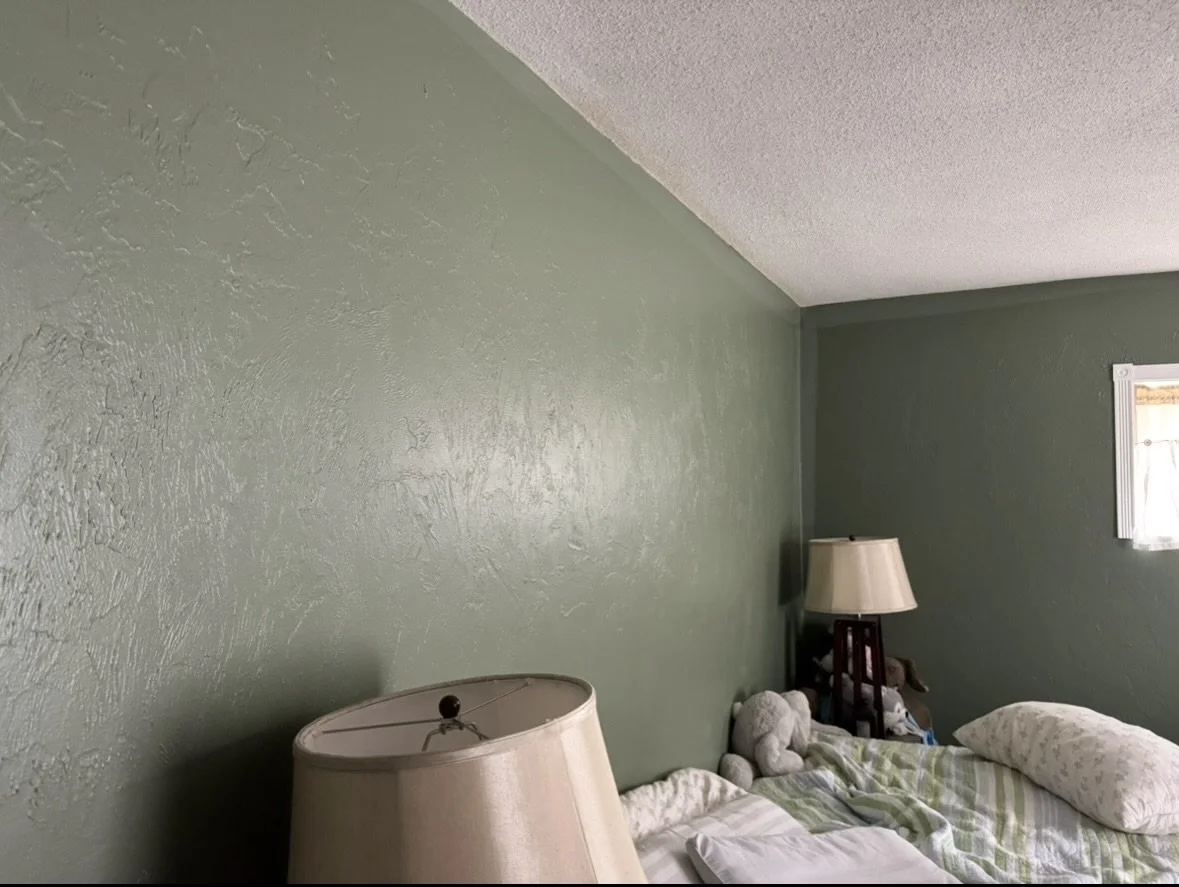
A roller leaves stipple — thousands of tiny peaks and valleys in the paint film. A brush leaves a comparatively smooth, flat surface. Even with identical paint, those two textures catch and scatter light differently. The smooth brushed band reflects more directly and reads shinier; the stippled field scatters light and reads flatter.
You didn't paint two colors. You created two surfaces.
The fix: carry the roller texture all the way to the edge, so the wall has one continuous surface instead of two. The method I use for this is below — it's the single most effective thing I've found for eliminating picture framing.
Cause 2: The cut-in dried before the roller got there
Paint needs a wet edge. Roll into a cut-in that's still workable and the two layers merge into one continuous film. Roll into one that dried an hour ago and you're laying fresh paint over cured paint, with double the film thickness where they overlap. That extra build reads as a darker, shinier stripe — the same mechanism behind lap marks in the middle of a wall.
Whether this bites you depends entirely on how fast you cut in. I'll often cut in a whole area before picking up a roller, because at the pace I work the first wall is still open when I come back to it. At a homeowner's pace — in a warm room, with a fast-drying paint, stopping to reload and reposition a ladder — that same approach means every cut-in has skinned over long before the roller arrives.
The fix: if you're not sure which side of that line you're on, assume you're slower than you think and work one wall at a time. Cut in a wall, roll it out, move on. Better still, use the method below, which takes the timing question off the table entirely.
The method that actually solves this
Here's what I do, and it's the most reliable fix I've found.
Carry a pail big enough to comfortably hold both a brush and a mini roller. Cut the edge in with the brush, then immediately roll up to that line with the mini roller before moving on. The brushed band never gets the chance to dry alone or stay smooth — it picks up stipple within seconds of being laid down. Then the large roller handles the field and meets a surface that already matches it.
The critical detail: the mini roller and the large roller have to be the same nap. Same nap, same stipple, no visible seam. Different naps and you haven't fixed the problem, you've just moved it a few inches inward.
On nap itself — most homes in Charlotte and the surrounding area have relatively smooth walls, so I run a 3/8" nap to keep stipple to a minimum. Heavier wall texture calls for more. Whatever you choose, put it on both rollers.
First coat versus finish coat
The rule tightens as you go.
On the first coat, splitting the cut-in and the field is survivable. The finish coat goes over both and evens out most of the difference, so if you cut in one afternoon and roll the next morning, you'll usually get away with it.
On the finish coat, don't. Ever. If you cut in and then plan to roll the field the next day, there is no coat coming behind to reconcile the two surfaces — whatever difference exists between that dried brushed band and the fresh rolled field is the wall you're left with. In my experience that's the single most reliable way to end up with picture framing on an otherwise good job. Cut in a finish coat only when you're rolling it out in the same session.
One caveat on the first coat: a dried cut-in still leaves a difference in film thickness underneath. Most of the time the second coat buries it. But if you're going over a dark color, or onto drywall that's patchy or unevenly primed, it can still telegraph through. When either of those is in play, treat the first coat with the same discipline as the last.
Cause 3: Flashing over patches, caulk, and repairs
Cut-in areas take a disproportionate share of the prep work. Caulk lines along the trim, spackle where the ceiling meets the wall, patched nail holes near the corners — all of that sits right in the band you're brushing.
Those materials absorb paint differently than the surrounding wall. A porous spot pulls more of the binder out of the film and dries duller; a slick spot of dried caulk holds the paint on the surface and dries shinier. Painters call this flashing, and it's the same mechanism that makes touch-up spots show in the middle of a wall.
The fix: spot-prime every patch, every caulk line, and any bare drywall before you paint. Primer equalizes the porosity so the finish coat dries at a consistent sheen. This step gets skipped constantly, and it's the single most common reason a technically fine paint job looks blotchy along the edges.
Cause 4: Different film thickness
A brush loaded with paint puts down a heavier coat than a roller does — or a lighter one, depending on how you're working. Either way, the cut-in band ends up at a different thickness than the field.
With flat paint you may get away with it. With eggshell, satin, or anything glossier, film thickness directly affects apparent sheen, and the band will show.
The fix: two coats everywhere, including the cut-in. Cut in and roll, let it dry properly, then cut in and roll again. A lot of picture framing comes down to a cut-in that got two coats while the field got one, or the reverse.
Cause 5: The paint itself isn't consistent
Two smaller possibilities worth ruling out.
If you're working from more than one gallon, the cans can differ slightly even in the same batch. Pros box their paint — pour every gallon into a single five-gallon bucket and mix — so the entire room comes off one blend. If you cut in from can one and rolled from can two, that alone can do it.
And if the paint sat for a while, the sheen additives settle. A can that wasn't stirred thoroughly from the bottom will lay down at a different sheen than one that was.
Cause 6: Sheen and light are working against you
None of the above is equally visible in every room. Higher sheens exaggerate every one of these problems, because gloss is exactly what makes texture and thickness differences readable.
And Charlotte homes with big windows or long walls get raking light — light striking the wall at a shallow angle — which throws every surface variation into relief. A wall that looks perfect at midday can show a clear picture frame at four in the afternoon. That's not new damage. It's light finding what was already there.
How to fix a wall that's already picture framed
Depends how bad it is.
Mild. Load a mini roller — same nap as the roller you used on the field — with the same paint, roll over the cut-in band, and feather it into the wall. You're adding stipple to match the surrounding texture. Often this alone solves it.
Moderate. Spot-prime any patched or caulked areas that are flashing, then re-coat the whole wall — cutting in and rolling wet into wet, one wall at a time.
Severe, or a sheen difference you can see across the room. Prime the wall and start over. Frustrating, but chasing it with touch-ups will cost more time than doing it once correctly.
Doing it right the first time
Spot-prime patches, caulk lines, and bare drywall before painting
Box your paint if you're using more than one gallon, and stir it thoroughly
Cut in one wall at a time and roll immediately into the wet edge
Keep the cut-in band narrow — no wider than you need for control
Cut in with a brush and roll that band immediately with a mini roller from the same pail
Match the nap on your mini roller and your large roller — 3/8" on the smoother walls common around Charlotte
Two full coats, cut-in and field alike
Never cut in a finish coat you aren't rolling out in the same session
Tape where the trim work is heavy and detailed; freehand where you're confident in your brush line
Check the wall in raking light before you call it finished, not just under the overhead
When it's worth calling someone
If you're painting a bedroom in flat paint, everything above is very learnable and worth doing yourself. Where it gets difficult is high walls, two-story foyers, dark colors, and anything in satin or higher — the sheens that show every mistake and the heights that make maintaining a wet edge genuinely hard.
That's the difference between a room that looks painted and a room that just looks right. If you'd rather not chase it, we're happy to take a look.
Frequently asked questions
What is picture framing in painting?
A visible band of different-looking paint around the edges of a wall, where the brushed cut-in meets the rolled field. Also called hatbanding. It's caused by differences in texture, film thickness, or absorption — not usually by the paint itself.
Why does my cut-in look shinier than the rest of the wall?
Most often because a brush leaves a smoother surface than a roller. Smooth surfaces reflect light more directly, which reads as higher sheen even with identical paint.
Will a second coat fix picture framing?
Sometimes, if you apply it correctly — cutting in with a brush and immediately rolling that band with a mini roller of the same nap as your main roller. If the cause is flashing over unprimed patches, you'll need to spot-prime first.
Can I cut in one day and roll the next?
On a first coat, usually yes — the finish coat evens out most of the difference. On the finish coat, no. There's nothing coming behind it to reconcile a dried brushed band with a freshly rolled field, and that gap is a common cause of picture framing.
Does flat paint hide cut-in lines better?
Yes. Flat and matte finishes scatter light and hide texture and thickness differences that eggshell, satin, and semi-gloss will show.
Can I just touch up the band instead of repainting the wall?
Touch-ups tend to flash on their own, especially in sheens above flat. Re-coating the full wall usually looks better than a repair to the band alone.
Painting a room and want it done once?
Flexcoat serves Charlotte, Matthews, Huntersville, Ballantyne, and the surrounding area.
About the author. Jose Rivera is the owner of Flexcoat, a veteran-owned painting company based in Charlotte, NC. A combat veteran with more than twenty years in the trade, he has spent that time helping homeowners find the right solution for their painting needs.